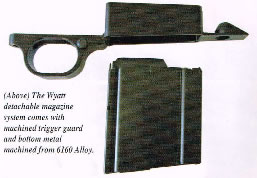
 For those who like the idea of a detachable magazine for their hunting rifle they can now convert their Ruger 77 Mk ll to take
a five round detachable box magazine which is made from heat treated steel.
 For those who like the idea of a detachable magazine for their hunting rifle they can now convert their Ruger 77 Mk ll to take
a five round detachable box magazine which is made from heat treated steel.
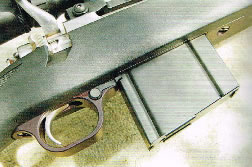
The system comes with a new machined trigger guard and bottom metal which is machined from 6160 Alloy which is advertised to be 98% drop in. (It came fitted to a rifle so I cannot comment on this.) The retaining latch for the magazine is situated on the right hand side just forward of the trigger guard. You may be interested to learn that the middle screw (forward of the trigger guard and under the back of the floorplate) is not used in this new system. This screw in the Ruger is about as popular as the one in the pre-1964 Model 70 Winchester was. Mr Wyatt has solved the problem. The magazine protrudes a fair way below the stock considering it only holds 5 cartridges. Yours truly thought by the length it was 10 so tried a few times to get them in but 6 was the absolute stop. The steel latch is spring powered. The follower is plastic and is powered by an oval coil spring wound from round wire.
Using the magazine is what everybody is interested in and once the cartridges are in it works well, although you will need to take a little care to make sure the magazine latches in correctly especially if the bolt is forward. I found you need to push the magazine up till it stops and rock it backwards and forwards at least once until you hear the audible "click" of the latch snapping home. Make it a habit of double checking the magazine is in properly.
The magazine box is made from folded steel and the lap joint is at the back of the box and the inside lap is 6.3mm lower than the cartridge stop. All cartridges have to be pushed to the back of the magazine so they feed smoothly. The rim of the cartridge can get hung up on this lap of steel, which means you have to be careful to stop pushing the cartridge all the way to the back. When you go to push the first cartridge in under the control lips there is a trough in the follower so the first cartridge is controlled where the trough starts.
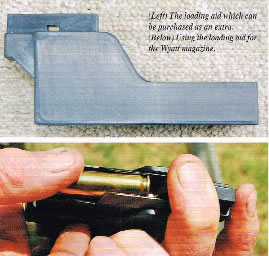
The follower spring is fairly strong, and the cartridges are staggered though not staggered as much as in the original factory magazine box. You need to have the magazine sitting on a table or on your leg so you can hold the bottom of the magazine so the follower can be pushed down to allow the next cartridge to be fed under the cartridge control lips. The loading aid helps this process.
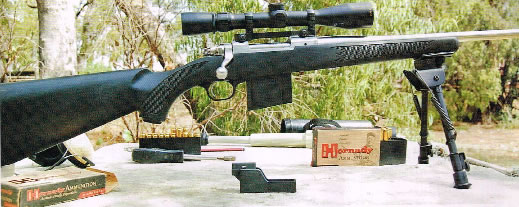
The rifle we were given to do this test was also fitted with a Lynx 3-9x38 in Lynx one-piece base and rings as well as a UTG Bipod. After sighting in. I fired a few shots at some targets because experience has taught that all may function fine in the workshop but when you pull the trigger recoil makes funny things happen. I am pleased to report no problems, and the magazine feeds like a good baby.
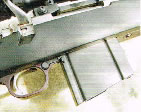
Photos below: (left) The bottom plate of the magazine complete with the Wyatt symbol. Also the replacement bottom meta/which only uses 2 bedding screws. (middle) The retaining latch and notch out of the back comer of the magazine and (right) the magazine properly fitted to the rifle.
 |
 |
 |
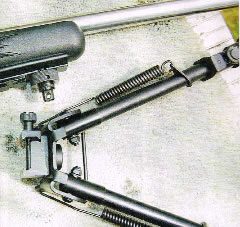
The UTG Bipod was used for the shooting in and it functioned well. To level it req uires the low leg to be extended to the required amount. The legs are held out at full extension with a spring loaded detent. The legs retract under spring tension when the detent plate is pressed in. The legs also have a knurled clamping screw which allows infinite height adjustment, which is your cant adjustment. There is a rotation limiting pin in the head of each clamping screws. The legs have a rubber foot which is held in place with a roll pin. Both legs fold through 90 degrees and are held tight with over centre springs.
 |
 |
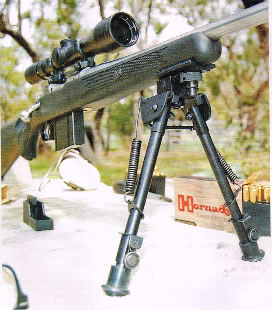 |
Photes above: (Left) Wyatt magazine and floorplate ready to go to work. Note the loading aid under the rifle. (Middle) The UTG QD system which uses a Wearer style clamp. Note also the threaded block which goes over the QD stud in the stock, also the knurled and slotted nut which locks the Weaver style clamp. (Right) The UTG Bipod tested. Note the round discs just above the rubber feet these are the knurled clamping screws.The plate immediately above these discs are the leg detent plates.
This Bipod is attached to the front sling stud using a small screw which passes through an adapter block which is threaded on the outside and has a QD sling stud on the end opposite to the end that goes over the stock sling stud. The alloy adaptor plate now goes over the threaded block and a knurled nut holds the adaptor plate to the stock. This nut has a relief machined in to its top face so when screwed up it absolutely guarantees the cross screw which goes through the QD stock stud cannot fall out. The top side of the adaptor plate has a soft p1ece of protecting material which contacts the stock. The underside of this plate has a Weaver scope base which allows for the QD feature of the Bipod. The top of the leg base has the Weaver clamp which is attached with a socket headed cap screw. There is a locking grub screw to ensure nothing comes loose. The clamp screw has a knurled and slotted nut to tighten the clamp.
All in all this equipment from Wyatt and UTG is well made, and the materials which have been used should guarantee a long service life. The Wyatt system complete, sells for around $515, spare magazines are $142. The UTG Bipod is $69. Distributor: www.lynxoptics.com.au |
 |
Text and photography by Andy Montgomery - GUNS & GAME - April-June 2016